Samsung Galaxy S10 Plus Disassembly Teardown and Restore
Samsung S10 Plus was hot sale in the smartphone market when it was released in February. The triple rare camera and sizable full-screen exterior look is a great attraction to customers. As Samsung brand fans, we are all fantastic about Samsung S10’s great looking and powerful function, meanwhile, some of us might be curious about the interior parts and structure. In this article, we quote the Samsung S10 Plus disassembly teardown and restore demonstration from YouTube video. We hope this would widen our horizon and would be helpful to our smartphone fix.
1. Samsung S10 Plus Teardown:
Before we start the process of Samsung S10 teardown, we should take all the tools ready like the prying tools, screen opening suck-cup, Philip screw driver. The whole process is complex and a bit difficult, we need to be careful and patient. Some of the internal parts and flex may be easy to break, we should focus on it. Now let’s do it.
1.1 Power off the phone, separate the back plate by prying it off with the pry tool
1.2 Undo the 16 Philip screws on the back plate, take down the wireless charging pad
1.3 Remove the bottom plastic cover
1.4 Disconnect the battery cable, the string cable, the headphone jack cable, the front-facing camera cable and remove the front-facing camera
1.5 Unscrew the three Philip screws on the board and remove the headphone jack
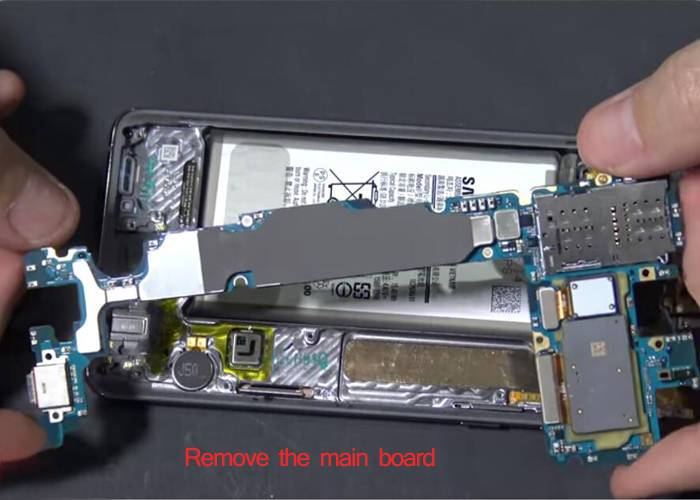
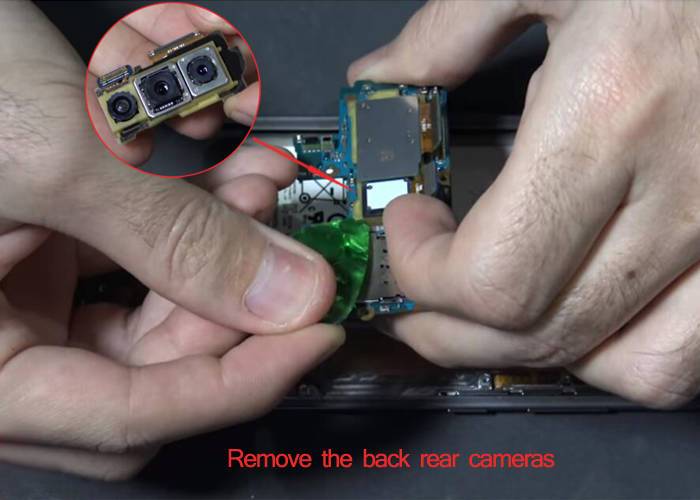
1.6 Remove the main board by prying up slowly, disconnect the back Samsung S10 Plus rear-facing cameras cable and remove it from the board
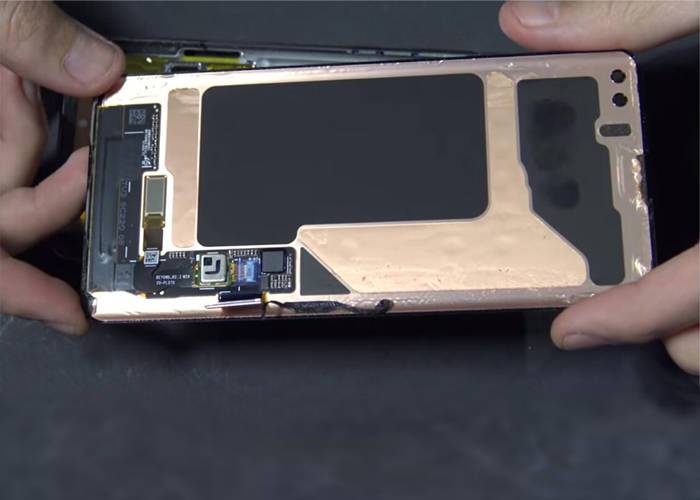
1.7 Peel off the protective tape and pry up and remove the copper vapor chamber
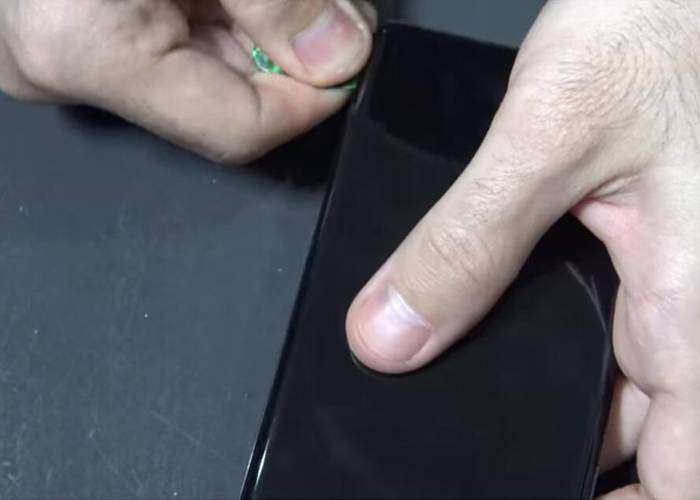
1.8 Separate the screen from the frame with a triangle prying tool
1.9 Tear off the protective adhesive tape and pry up the screen flex cable, don’t break the screen fingerprint scanner flex
1.10 Pry off the battery from the frame and then the vibrator motor and earpiece speaker as well
2. Samsung S10 Plus Restore:
The restore process is easier than teardown, we just follow the above step order back and reinstall the parts. On the other hand, we have to keep in mind the right place each part it used to be and don’t mess up the order. Here we go.
2.1 Put the headphone sticker and the vibrator motor back in the frame, as well as the battery
2.2 Insert the cable back to the slot, reseal the screen back to the frame and adjust the right position
2.3 Place the copper vapor chamber back
2.4 Put the front cameras back to the main board and connect the cable
2.5 Place the mainboard back and screw the three Phillip screws
2.6 Connect the headphone jack and the screen flex back to the main board, install the front-facing cameras back
2.7 Restore the speaker assembly and connect the battery cable back to the mainboard
2.8 Put the plastic cover with wireless charging pot back, screw the 16 Philip screws back
2.9 Seal up the back plate back, better cover with new adhesive on the edge by hot gun blowing
The demonstration steps might be a little complicated, but we have learned much about Samsung S10 Plus model from this article. On the other hand, you will know much about Samsung S10 Plus internal parts and repair technology if you are clear about all these steps. As a mobile phone parts supplier, we suggest you take attention on the parts like Samsung Galaxy S10 Plus LCD Screen and Digitizer Assembly or Samsung Galaxy S10 Plus Rear Face Camera if you are running a repair shop. Any new idea about Samsung S10 repair or questions the above steps, please leave your comment below.


评论
发表评论